Divider

Sunday, April 16, 2017
Easter2


Happy Easter!
Happy Easter! #Marathonmomma #familytime #lovemykids #lakeplacid #iloveny #travelwithkids #travelwithdogs #goldenretriever #mommyandmetravel #travel #adirondacks
Thursday, April 13, 2017
How Do I Organize All of My Bullet Journal Supplies?
How I Started Out Organizing My Bullet Journal Supplies
If you're anything like me, then once you start working on a bullet journal, you start accumulating fun supplies to personalize your planning and journaling. Well, as you amass a collection of stamps, inks, writing utensils, stickers, etc., there becomes the issue of organizing and storing your supplies. Ideally, whatever system you choose to use should allow for at least some of these things to be portable so that you can bring them with you to journal and plan on-the-go.
I am going to share my organizing ideas with you so that you can get more ideas of what system it is that you wish to use to organize your own bullet journal and creative planning supplies. I will show you what worked for me, and what didn't...well, I'm actually going to begin with what didn't work the best for me and then show you how I improved my system.
When I first started organizing my supplies, I didn't want to have to spend any money. I would rather have spent the money on the fun supplies! They add up quickly! So, this is what I had around the house to start with:

The large, clear carrying case was something I got from Michaels. The two containers with green lids were originally from the dollar store, and the small pink and purple cases were from Staples. Those small cases were perfect for me to store my tiny rubber calendar/appointment stamps in. Some of those stamps are as small as your pinkie nail! You don't want to lose them! The containers with the green lids had two purposes. One of them was used to hold all of my mini stamp pads, as well as my small acrylic stamp blocks like this:


The other container became a catchall for my pencil sharpener, eraser, tape runner, and fun doodads like small, colored clothespins, my post-it flags, scissors, etc.
I borrowed my daughter's pink and black leopard zipper pouch to hold my pencils, markers, and pens. I sort of felt like I was in elementary school all over again! As I started to accumulate more writing utensils, that case wasn't big enough anymore. And, although quite large, the clear Recollections case very quickly became too small to use.
What I had liked about the clear case originally was that it held everything I had at that time, including my creative planner and the hole puncher I had purchased to go with it. I also liked having a handle on the case to carry it with me. The case became quite cumbersome, though. I mean, the thing is ginormous! If you aren't planning to take it with you anywhere, it is a great case to store your supplies in, but I really needed mine to be portable. And as my supplies grew they no longer fit in the case...at least not in this way.
I realized I needed something else to use, and saw these pouches on clearance for 75 cents a piece, so I gave them a try. They weren't the cutest pouches in the world, but I figured I would just add a vinyl decal on them with my Cricut, and that would increase their curb appeal for me.

So, one of the pouches I used for my writing utensils, and the other one I tried to fit all of my office supplies, doodads, and stamp pads in. Well, they became too bulky and I just felt like they were disorganized! This Type-A lady couldn't handle that! So I was on the search for a new system!
After quite a bit of contemplating and searching, I came across this bag:


When I saw it at Michaels, it was $29.99 and there was absolutely NO WAY this frugal momma could justify spending that kind of money on a case for my journal. But, as we all know, Michaels has coupons!! I had a 50% off one, and I decided that this case would make my bullet journaling much easier, so it was worth the $15! And let me just tell you that I LOVE it!! The thing is a workhorse. Let me show you how I use it.
How I Set Up My Bullet Journal Carrying Case
This is my actual bag, loaded with all of my crap!

I didn't take a picture of it, but there are actually two large zippered compartments that are separated by fabric in the middle. The fabric on the outside is a smooth fabric that feels like one of those kinds you can wipe clean. I haven't spilled anything on it yet, so I can't say for sure if that is true, but it definitely feels like that kind of fabric!
I love that everything is completely enclosed in the case, and that it seems pretty darn sturdy. I have that thing packed and can just barely zipper it closed, but it doesn't feel like it's coming apart anytime soon (if at all)! The same thing goes for the handles. They're pretty strong, as well!
When I first open up my case, the large compartment is big enough to hold my creative planner. On the left side of the case, you can see that there is a large pocket. It doesn't have any way to close it, which is sort of a downfall, I feel. But I'm thinking I might add some Velcro to it so that whatever I store in it won't fall out. Currently, I am using it for papers.
When I take my journal out, there are two detachable, zippered, see-through pockets. This is what finally sold me on the case, actually. I liked that I could remove them and place them in front of me to easily remove supplies as I am working. I like that they're see-through so that I can easily access the particular item I want. And I like that they are zippered so that my supplies stay put! You can see in the photo that I use one of the pouches for my sketching pencils, and one for my office supplies.
When I take my journal out, there are two detachable, zippered, see-through pockets. This is what finally sold me on the case, actually. I liked that I could remove them and place them in front of me to easily remove supplies as I am working. I like that they're see-through so that I can easily access the particular item I want. And I like that they are zippered so that my supplies stay put! You can see in the photo that I use one of the pouches for my sketching pencils, and one for my office supplies.

On the other side of the carrying case, there is the second zippered section. When I open that up, I have an elastic pocket on the left, which is large enough to hold my sketchbook! Behind that pocket is another large zippered pocket, where I store my washi tape along with my little cases for the mini rubber stamps and stamp pads. I actually ended up buying two new ones that were a little bit longer and flatter, though. I found them at Wal-Mart, in the office supplies section and they were pretty cheap ($1.25 I think??). They're a much better size for my mini stamp pads and stamps, for sure!
The right side of this section is a giant, see-through, zippered pouch. This one is not removable, but I still love it! It is big enough to store all of my pens and sharpies!!

As you can see, this carrying case holds a TON of supplies!! Everything I really need to journal and plan on a regular basis is in this thing. The only thing I couldn't fit in it was my hole puncher. Oh, and the kitchen sink. The kitchen sink will not fit!
Does anyone else have this case? Do you love it like me? Or do you have a different opinion? What other organizing systems do you use for your bullet journal supplies? Write a comment below and let me know!
Until next time...
Organizationally yours,
Marathon Momma
Does anyone else have this case? Do you love it like me? Or do you have a different opinion? What other organizing systems do you use for your bullet journal supplies? Write a comment below and let me know!
Until next time...
Organizationally yours,
Marathon Momma
Tuesday, April 11, 2017
Let's Do Some Good!
Follow my blog with Bloglovin

Marathon Momma Online Shop
I am in the middle of working on my next post about bullet journaling as I promised in my last post...(my supplies and how they're organized)! But I sorta got sidetracked (like I often do!!) and I set up an online shop on Zazzle, which you can see right here:
I am in the middle of working on my next post about bullet journaling as I promised in my last post...(my supplies and how they're organized)! But I sorta got sidetracked (like I often do!!) and I set up an online shop on Zazzle, which you can see right here:
View more gifts at Zazzle.
I'm super excited to share my logo with you all! Are you a Marathon Momma, too? Running Mommas...wear one of the Marathon Momma tech t-shirts in your next race to proudly show the other runners just how freaking AMAZING you are! And Mommas who might not run races, but run-after-kids all day, wear your Marathon Momma t-shirt as a badge of honor that shows that you are not only surviving each day, but KILLING it!
You can even be a Marathon Momma, fighting the good fight of putting one step in front of the other, first thing in the morning with an adorable insulated travel mug! It's perfect for your coffee, tea, or for when you have to attend yet another kid's birthday party and need to disguise the vodka. (Just kidddddding! I would never recommend that!)...Or would I??? Sometimes ya just need a little something extra! Hahaha!
Marathon Momma Donates
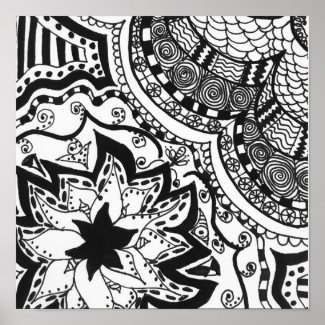
I also am creating other products from my own artwork and designs in my online shop. Like those fun Zentangles I posted about a while back...you can have a poster or canvas print of them!
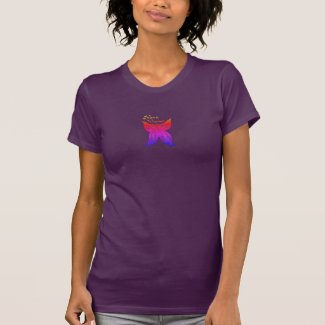
A portion of all proceeds will be donated to the National Fibromyalgia and Chronic Pain Association!! So, how it works is that I will make a portion of each sale in my shop on Zazzle, which helps me continue to blog, and will hopefully allow me to once again contribute financially toward my family. So, yes, I do benefit from a sale...BUT...I will also be sharing the love, too! Just like this fibro butterfly, several of my designs will benefit different charities.
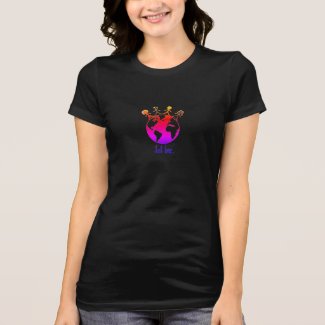
For example, I also created a special design called "Just Love". I am a strong supporter of equal rights...for EVERYONE! So I created this design to add to t-shirts, bags, stickers, etc. that will help benefit the American Civil Liberties Union.
A portion of every sale from this design will be donated to the ACLU! The ACLU is fundamental to our democracy. Their mission, as stated on their website, is "to defend and preserve the individual rights and liberties guaranteed to every person in this country by the Constitution and laws of the United States."
Those are just two of the organizations I hope to make donations to, and there are many more! For each design I create, I will mention in the description of the item on my shop what charity will benefit from it. I am wicked excited about this additional path to my blog and I hope you will help me add support to these wonderful organizations! Please share my post or Zazzle Shop with your friends and family, and together, let's do some good!
Just love,
Marathon Momma
Sunday, April 9, 2017
#Homemade #woodensign I just finished (2 days late) for my hubby's birthday. I've been working on it for a couple of months on and off. It was originally supposed to be a Valentine's Day present for him. 😬😳😱😜 He loves it, though!!! Winner, winner, chicken dinner!! #craftingismytherapy #crafts #camping #springishere #cantwaitforcamping #seasonalcamping #blogpost #artist #familyfun #familytime❤️ #summeriscoming #painting #paintwithlove

via Instagram http://ift.tt/2ofuwcs
Wednesday, April 5, 2017
Bullet Journaling (Part 2)
Happy Wednesday, everyone! So last week, I wrote a post about what a bullet journal (bujo) is. If you missed out on that post, you can find it here. This week, I am going to share with you how I am using my bullet journal/creative planner to keep my life more organized.
My Introduction to Bullet Journaling
Before I do that though, I want to walk you through my process of choosing how to get started and dive right in. As I said in my last post, I really didn't know much about bullet journals until I happened upon them while searching up creative lettering in Pinterest. As I came across pin, after pin, after pin of fabulous ideas, I really wanted to give it a tiny little try.
Well, I just so happened to come across one of my kids' drawing pads on the kitchen table and I was feeling very fatigued (and quite frankly, also trying to avoid working on the mountains of laundry I had to do). So I slid the drawing pad over and began to sketch. I started out very simply...writing words in fancy fonts with borders around the page and a few doodle elements. I had to keep my Pinterest app open on my phone so that I could search up ideas. Here are my first few doodles:


And here is the sketch that unmasks the truth:

Instead of doing the laundry, I just drew it! Hahaha!
After a few simpler sketches, I decided to try something a tad more challenging and intricate, so this is what I drew:


As you can see, my sketches and ideas became more complex...and that is mostly because I kept coming across more bullet journal tips and ideas. At this point, I knew I wanted to try out bullet journaling. I loved the whole idea of it!
Finding the Right Bullet Journal or Planner
In what little spare time I had, I started searching for the right type of journal that would work best for me. I read other bloggers' reviews and recommendations. Here are some of the most highly recommended journals:
After reading what experienced bullet journalists liked using, I checked out reviews on Amazon and craft store sites, and finally, I headed to the stores to look at what they had to offer. At each store, I found different types of journals and planners. I had to really think it through and consider it an investment (they ain't cheap!). I began to develop a list of criteria in my head for what I wanted to be able to do in my journal/planner and this is what I had decided it needed to have:
- Visually attractive...if I'm going to be using it all day, every day, I certainly want to enjoy the experience! :)
- Blank pages for creating collections (like lists...bucket lists, book lists, movie lists, etc.), journaling, and sketching.
- A pen/pencil holder.
- A monthly calendar already made and printed out for an at-a-glance look at the month's appointments and events. I am a fan of making life easier for myself and although I simply adore what other people are able to create graphically, I would prefer to not have to recreate the wheel (or calendar) each month. I think many other busy moms are in the same situation... trying to take extra time out frequently to draw calendars is just something I am not willing to invest the time in. Besides, I think this is one of the things that felt overwhelming to me about creating a bullet journal...it's labor intensive, so I took it off my to-do list and found a pre-printed calendar where all I had to do was fill the dates in.
- A weekly calendar...again, pre-printed.
- A notepad to take notes on whenever I need to...especially for handling all of the tasks involved in caring for Miracle Man...phone calls to doctors, questions to ask any of the professionals involved in his growth, education, and care.
- Pockets for storing receipts, papers, supplies for my journaling
- Rings and a hole puncher...this was particularly important to me because I wanted to be able to create my own bullet journal printables and be able to put them into the journal easily. I also wanted to be able to hole punch any piece of paper that I wanted to keep track of and put that in my binder. It was important to me to be able to move papers around, as well.
- Large enough to keep tons of notes!!! I wanted to be able to put all of my to-do lists, shopping lists, schedules, calendars, all in one place.
- Meal planner--I have only used this a couple of times so far, but I do intend to use it more frequently as I get into more of a habit of tracking everything!
- Inserts for putting pictures in.
- Dividers so I didn't have to make my own for all categories
Here is the planner I purchased and the hole puncher that goes with it:
So, in the end, I had decided to go with more of a planner type of style, but I still wanted to incorporate the bullet journal ideas like the collections and lists, as well as the creative aspects.
How I Set Up My Journal
I consider my journal to be a hybrid journal because it's not set up exactly like a bullet journal, but it's definitely more than a planner. Many of the features that came with the planner are typical of the ones found in the creative planners you can purchase on the market. I will show you some of the cool ones below, as well as some of the features I added to my planner to make it better suit my needs. So without further ado, here is how I set it up.
Keep in mind, that I only recently started this process, so I'm really a newbie and have a ways to go before I am utilizing more of the possibilities.
Inside of Journal
 |
| Inside of Front Cover...Has Pockets For Papers |
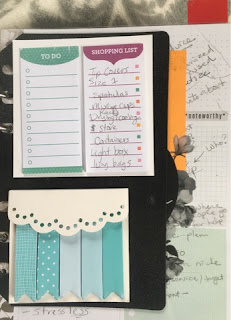

The first thing I see when I open up my planner is this plastic divider. I had it laying around the house from my old DayRunner that I used to use in graduate school. The pre-punched holes didn't quite fit in my new planner, so I had to hole-punch it to get it to work. Then I glued on these sticky notes so that they would be right in my journal, ready to use at a moments notice. I like that they are the first thing I see when I open up my binder because I can highlight my most important to-do tasks and shopping lists and see them immediately each time I open up my bullet journal. I found the sticky notes at Michael's, and I love them! The little flags in varying shades of turquoise I use to highlight specific pages that I need to keep track of in my journal. They are a little bit flimsy for the purpose I am using them for, so I will have to find something else to use in their place. But aren't they just adorable?!
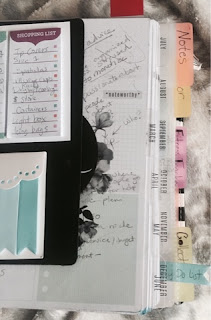
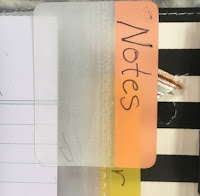
The planner came with the month dividers and spreads, as well as the weekly spreads. Each of the monthly dividers is made of a clear plastic and decorated with a floral design. As you can see, I added some of my own tabs. I found these at Wal-Mart, in the office supplies section. I like that they are colorful and can stick right to the page that I want them to. Here is what they look like up close:

This customizable page is the first page of each new month. It came with the planner. I like having a space to plan my goals for the month and writing down a favorite quote. It helps keep me focused and mindful/intentional throughout the month.

Here is the monthly spread that comes with the planner. I love not having to create a monthly spread each month because just filling in the dates, appointments, events, etc., and highlighting important moments with my stamps is time-consuming enough for this busy Momma! Speaking of the stamps, I do plan on creating a Key so that I can be consistent with the meanings of each stamp and color, but I haven't had the time to do that yet.
I love the blank spaces around the month where I can write some notes about what needs to be done or remembered during the month. Since we are only at the beginning of this month, there isn't that much scheduled yet. But there will be! By the end of the month, there won't hardly be any space left on these pages!!
I love the blank spaces around the month where I can write some notes about what needs to be done or remembered during the month. Since we are only at the beginning of this month, there isn't that much scheduled yet. But there will be! By the end of the month, there won't hardly be any space left on these pages!!


At the end of each month, there is a note page. It's really not enough room for me to take all of the notes that I need to on a regular basis, so I ended up adding a whole Notes section. Above, you saw that one of the tabs that I added was this Notes section. I couldn't find a notepad that was pre-punched for this brand and size planner. But, in the clearance section of Michaels, I did find a notepad that coordinates with my planner. I had to rip off each of the pages individually and hole punch them to put them in the binder. I'm not entirely pleased with the notepad in the end, though, because it isn't just a straight notepad. Each page is different and some of the pages have round, oval, square, or rectangle shaped spaces that are pre-labeled. They're mostly made for journaling. I may use some of the pages to journal, but at the moment, I am really focused on note-taking, so they don't really work for me. However, it does give me a space to write! I will be on the lookout for a replacement that suits my needs better. I'm also creating printable bujo pages that I can fit in my planner and if I don't find a notepad that works, I will just print out the one that I made on my computer (after I buy more ink for my printer, that is!!!).


Do either of these Zentangle drawings look familiar?! I posted the pic on the left in this post. And the one on the right I posted on Twitter a while back. Side note: The butterfly is the adopted symbol of fibromyalgia sufferers (like me). Anyway, I slid them into some sheet protectors I purchased for the planner to use as dividers for different sections. It's kind of nice to see my artwork daily, instead of having it in the drawing notebook, tucked away somewhere. The package of sheet protectors came with different sheet set-ups so that you can use them to put in photos of different sizes, notecards, business cards, etc. There were several of each type included. These sheet protectors weren't made by the same company as my bujo, so they didn't have the proper holes punched in them. But, they were the right size to fit in my planner, so I just hole punched them!

The next part of my planner is filled with my own sections. I have my general notes section, a section for Miracle Man (to keep track of anything I need to for his care), and my Collections section. I created an Index (similar to the typical bujo Index) for the Collections to help me keep track of them. Then I added the collections that I made prior to having a bujo. Gotta love that hole-puncher!!! I also tore off the remaining blank pages of my sketch book and hole-punched them to add here for more collections. I LOVE this section!!!! This is where I do more of my journaling and creating. Below you can see some of the ones I have done so far.

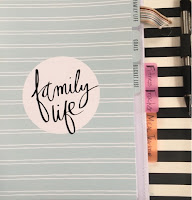
After my personalized tabs, there are a few more tabs that came with the planner. There is a Family Life tab, where I can keep track of my family's activities, a Goals tab, where I can set goals and write up my plans for how to achieve those goals, and a Bucket List tab. I love that these tabs are already created and set up with the lines and features that are very user-friendly. Here are some pics I took to give you an idea of what these tabs are like:
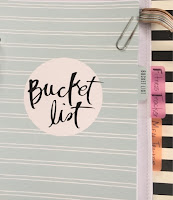
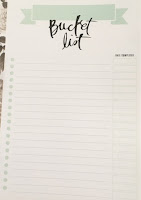
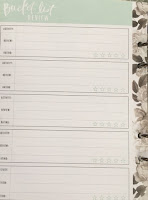
The last two sections I have in my planner so far are my fitness tracker (which I have to sheepishly admit that I haven't used just yet), and my meal tracker...with shopping list. These are two tabs I really wanted in my planner, but which didn't come in the planner I purchased. I could have created my own spreads by hand, but I think you can guess by now how I would feel about that! I would rather put my creative time into super-fun collections!
So anyway, I found these two trackers at Joann Fabric's, and like several of the other features I added, they weren't made by the same company as my planner. And as such, they did not have the correct holes. So, yup! I hole-punched them! I want to point out here, too, that many of these things that I added to my planner I had to purchase on the same day as when I got my planner so that I could match up the paper sizes. Of course, you could always just bring a set of measurements with you to the store if you didn't do it all in one day...but that would mean another trip to the store.
So anyway, I found these two trackers at Joann Fabric's, and like several of the other features I added, they weren't made by the same company as my planner. And as such, they did not have the correct holes. So, yup! I hole-punched them! I want to point out here, too, that many of these things that I added to my planner I had to purchase on the same day as when I got my planner so that I could match up the paper sizes. Of course, you could always just bring a set of measurements with you to the store if you didn't do it all in one day...but that would mean another trip to the store.
 |
| Notice the blank pages?!?! I've gotta get my butt in gear!! |
 |
| I have used this a few times, but not regularly yet. Take a look below at my favorite feature of this section!! |

 |
| Ohhhhh, yeah!! That's right! That is a scored and perforated tear-off-able shopping list!! Yippeeee!!! I heart it!! And did you happen to notice the pencil holder loop on the planner?! Essential, in my opinion!! |
Okay, so that's a wrap. My planner/bujo is complete! Well...almost! I have some other ideas that I would like to add to it over time. For the most part, though, I'm pretty pleased with it. How'd I do as a newbie? Do any experienced bullet journalists/creative planners have any additional tips for me?
Yours in bujo obsession,
Marathon Momma
P.S. My next post will be all about how I keep my fun supplies organized!! It took me a few weeks to come up with the best system, but I've got it now!!


After three weeks of #baking, decorating, and packaging, these #sugarcookies for my nephew's 6th Birthday are finally shipped! Now it's time to get my house back in order!! 😜 Happy birthday, Nicholas!! 🎂🎉💗 #sugarcookieart #kids #sugarcookiesofinstagram #circus #carnival #birthdaysurprise #family #blogpost #blogpostcomingsoon

via Instagram http://ift.tt/2o9j3M8
Subscribe to:
Posts (Atom)