Divider

Divider

Thursday, April 27, 2017

Your Family Should Be Seasonal Campers!


Seasonal campsite


Have you heard of seasonal camping?  Have you ever wondered if seasonal camping is right for you and your family?  It is a wonderful experience for my family and me! Here's why I believe you should give it a try:

The Cost Value of Seasonal Camping With a Family
Because, let's face it.  That is one of the most important factors in family vacation decision-making.  So, let's talk about the costs of seasonal camping.  Seasonal camping can run you anywhere from about $1500-$5000 for a seasonal site, including additional costs of electricity, cable, Wi-Fi, and activities.  Naturally, the cost depends on what type of camping you wish to do, which campground you choose, the amenities that are available at the campground, and of course, if there are any available sites in the campground you wish to stay. 

At the outset, that's a lot of money to fork over all at once for a vacation.  And of course, you have to already own a camper in order to be seasonal.  I am not aware of any campgrounds that allow you to be seasonal in a tent...nor do I think most people would wish to be.  After all, we are an industrialized nation of people--used to our creature-comforts.  Wilderness camping might be great for a weekend, maybe a week if you're so inclined, but for an entire season with kids in tow, I don't think so!  In any case, most seasonal campgrounds have specific rules about what they will allow as a seasonal camping trailer.  For example, you aren't usually allowed to be seasonal if you are camping in a pop-up trailer.  And some campgrounds will only allow you to be seasonal if your camper is no older than 10 years old.  But not all campgrounds are quite that strict.  You just have to inquire about their rules as you perform your search.  I will talk more about the campground rules below, though, because it is pretty important to pay attention to them!


campsite


So, getting back to the cost...the average yearly family vacation budget is typically between $2,000 and $4,000. Naturally, there are many factors associated with the costs of a family vacation.  And there are so many options for what type of vacation you will take.  But, just for argument's sake, let's take the average and say that your family's vacation budget is $3,000.  What do you usually get for that $3,000?  You get your transportation, hotel or other type of accommodation, a few activities, and your food...for one week.  If you're super thrifty, you may be able to do it for a little less or stay for a few more days.  But ultimately, you have about a week-long respite from the daily grind for your $3,000.

When you are a seasonal camper, though, (at least in my experience in the Northeast) you can have a semi-permanent vacation home from somewhere in the middle of the spring, all the way through the fall.  Some campgrounds are open to seasonal campers from mid-April to mid-October.  Our campground opens up at the beginning of May, but it runs through the middle of October. So as long as you choose a campground close enough to your home, you could conceivably camp every single weekend, all of the major spring and summer holidays, AND your one week vacation for about the same cost as a typical week-long vacay!  And that even includes the activities! Plus...and this is a big one...it's all family-friendly! No worries that you've chosen the wrong destination to bring your children to.  Sure, there may be some partiers at a campsite near you every now and then, but from my experience, most seasonal campgrounds bill themselves as family-friendly and work hard to keep it that way!

Activities for Children
Most campgrounds and RV parks that offer seasonal campgrounds have ongoing daily and weekly activities for children.  Many campgrounds also offer theme weekends, which is super fun for the kiddles!  One of the campgrounds we used to go to frequently, for example, had a western theme on one of the weekends we were there.  During that weekend, they hired a company to bring in ponies for the kids to ride (which was included in the price of camping).  They also had a family dance with a dj and country line dancing lessons.  All of the other activities planned for the weekend were family-friendly games that revolved around the western theme, too.  It was really fun!


seasonal camping
Some of the other typical themes you may find at a campground are Halloween, Christmas, and Super Soaker weekends.  During the Halloween weekends, you will typically see campsites decorated, there's usually trick-or-treating from site-to-site, possibly a costume contest, and maybe even a haunted house...all in the middle of the summer!  The kids have a blast!  This theme and some of the other themes are very popular with families, and as such, book up early!  But when you are a seasonal camper, you are already set for each of those favorite weekends.  So you already know you will get to be there with your children!

Now, not all campgrounds that offer seasonal sites have weekly themes or activities.  Smaller campgrounds may offer activities and themes a few special weekends throughout the season.  The campground we are seasonal at fits more into this category.  There are occasional family dances with a dj, and they do have Halloween and Christmas weekends. There's usually at least a few activities like arts and crafts scheduled each weekend.  But there isn't a non-stop schedule of things for the kids to do...and I, for one, LIKE that! 

Our Campground
We have done all sorts of camping with the kids over the years (except wilderness).  We've gone to the fancy RV Parks with loads of activities, and we've camped at a state campground where the only scheduled activities were the ones you planned yourself.  For me, I prefer to have a mix of both scenarios as a seasonal camper.  I like having the activities for the kids as options to keep them entertained.  I like the community feeling of participating in the activities with the other campers, the kids making friends, and us adults meeting new people.  I like to have a variety of things to do with the children...especially when camping all season, because it can break up the monotony. 

nature at camp
But I also like spending quality time with my family where it's just us.  Hanging out at the campsite, going swimming, hiking, boating, fishing, or whatever strikes our fancy for that day.  Having a whole schedule of activities can be great, but there were times in the past where we went camping at one of the RV resorts and I felt rushed, too scheduled, and then ultimately frustrated because I wanted my kids to be able to participate in all of those fun activities.  I didn't want them to miss out.  But we couldn't always make it to the things we wanted to, for one reason or another. Too, if I was at the campground alone with the kids and my boys were napping as infants/toddlers, it made it challenging for Little Miss.  She wanted to participate in the activities for her age group, but wasn't quite old enough to go off on her own to be able to join in.

Too, I find that kids these days are so over-scheduled, and also so used to getting so much.  They get treats and enjoy special activities on a regular basis.  I think it makes it harder for them to appreciate those special moments that we create for them (like a family vacation) because they have come to expect all of these activities and treats we give them so often.  Sometimes you just need to take a step back and say enough is enough. So I LIKE that our seasonal campground doesn't have a bazillion way-over-the-top things to do...like blown-up waterslides, for instance.  Our campground has a lake with a beach, a couple of playgrounds, tons of hiking trails, a stream, a camp store, a pavilion, some theme weekends and activities, and the great outdoors.  It's perfect for getting the kids to play outside ALL day, make new friends, explore nature, and experience a childhood unplugged (at least when it's not raining, that is!).  And, yes, our campground does have electricity, running water, and WIFI!

Just as a side note to give you some perspective, our campground is on the lower end for seasonal fees.  We are actually less than $2,000 per season and that includes the electricity and WIFI.  So it really is a great value for the money.  Plus, you don't have to pay it all up front.  Usually you place a deposit down in the fall for your next year's seasonal site.  Then later in the winter or early spring, you have to pay the rest of your fee before the season actually begins. So that spreads out the total cost and it gives you some time to save up for the rest!

Bring Your Dog Camping
Another great thing about seasonal camping is that it is dog-friendly!  This is especially important since you will be away from home much more frequently.  It's one thing to hire a dog-watcher or kennel your furry friend(s) for a weekend or a week, but every weekend and many other days added in there could be hard on your pet...and EXPENSIVE!  But at a seasonal campground, Rover is welcome to join you!  We bring Kallie with us and she LOVES it!  She gets so much exercise and attention, how could she not?!  She gets to go on hikes, go swimming, be outside, and be with her family!  She's a happy little camper!

golden retriever by campfire

New Friends at Camp
One of the best parts of being a seasonal camper is that you get to know other people at your campground.  You see the same people at the beach or pool, at the rec hall/pavilion, during the scheduled activities, and at pot-luck suppers.  You meet your neighbors near you (especially when your kids run over to pet their adorable dogs all day long), and you begin to develop that sense of community.  These people become your weekend family.  And you can be as involved with other seasonal campers as you'd like (or just be a recluse sitting by your campfire...alone...every night if you wish).  It's totally up to you!  But most campers are a friendly sort of bunch and are also there for the social aspect of it.  They enjoy meeting other people, too!  Otherwise they probably wouldn't be there! 

campers
As a mom of three little ones, I have always appreciated this aspect of seasonal camping, too.  Because as you frequent a campground or become seasonal and get to know some of the other families, you don't feel quite so alone.  Whenever we have camped in a long-term type of situation, it is usually within an hour's drive of Prince Charming's work.  Typically that means that I am at the campground all day or for several days as a solo parent with the three kids while he is at work and then he joins me when he can.  Believe me, this is not an easy feat!  And throw in a dog or two--it can become overwhelming!  Yet, wherever we have been at a camp in this situation, people have been friendly and helpful.  And that makes it much better for me. Even if it just means I have another adult to chat with for a few minutes, those few minutes of kindness provide me with the energy I need to keep going until it's bedtime! 

Seasonal Camping Rules
Each campground has a separate set of rules for their seasonal campers.  Usually you receive a handout of all of the rules when you sign the contract for your site or at the beginning of the season.  The rules at each campground can be very different, so be sure to ask about them in advance.  You definitely want to know what you can and cannot do on your site before you jump in with both feet!  Some campgrounds, for instance, allow you to build permanent decks and other structures for your site, while some only allow for temporary structures.  Additionally, some seasonal campgrounds allow you to store your camper on your site all year long, while some (like ours) require you to remove your camper at the end of the season.  Some campgrounds also allow or limit the number of "buildings" or similar structures (think: gazebos, sheds, etc. here) you may have on your site.  There are all sorts of rules you will need to know about your seasonal site at your campground...so make sure you read through them thoroughly.  Any violations of the rules can get you kicked out of the campground (or not allowed to return the following year).

But do you know what's cool?  Most campgrounds do allow you to decorate your seasonal site.  Many will let you do some landscaping, and improve your site the way you see fit (as long as it doesn't break the rules or impinge on any other camper's experience there).  The kids and I always enjoy checking out other people's camp set-ups and decorations.  We love to see the cute garden gnomes and flamingos during the daylight and the lighted palm trees in the night.  We are actually going with a theme for our camp decorations this year...tropical!  Flamingos, palm trees, flip-flops, grass skirting on the tables, flamingo lights, and hibiscus and tiki decorations...super fun!  I can't wait until it is all set up!  I will post a YouTube video of a tour of our campsite when it's done! 


So that's a quick breakdown of why I believe seasonal camping is an awesome experience and an incredible value for your vacation dollars!  Feel free to ask me any questions you may have about seasonal camping in the comments below!

Yours in camping,
Marathon Momma


This Mother's Day, tell your Mom she's a Superhero because she's a Marathon Momma!

Tuesday, April 25, 2017

Top 10 Reasons to Get Your Kids Running


Children learn to run

Running is a wonderful sport for anyone...men, women, old, and young.  It may not be everyone's cup of tea, but it sure does keep you healthy!  As adults, we all know that we should be getting exercise and eating healthy.  But we are also responsible for our children's health.  All too often in our busy lives, children become sedentary, addicted to all things electronic.  Wouldn't it be great if you could channel that addiction into a healthy sport?  Better yet, one that you can join them in?  Running is the perfect sport for busy families! Here are my top 10 reasons why you should get your kids running!


1. It's great exercise for them.  It gets their hearts pumping and their muscles moving.  It burns calories and fat efficiently.  Our society is incredibly obese, and children are increasingly overweight.  Excessive weight, as we have all heard, increases a number of health risks for our children, including diabetes. The risks do not stop in childhood, either.  Children who grow up in a sedentary lifestyle with an unhealthy diet have a very difficult time overcoming the habits and patterns they develop as kids.  So, overweight children become overweight adults.  Obesity in adults greatly increases their risk of cancer, stroke, and cardiovascular disease!  But running (and other forms of exercise) can help your child learn to live a healthy lifestyle that will last a lifetime!
2.  It can be done any time of day, so you can work around your schedule/homework/dinner, etc.  If it's dark out, have them use a headlamp...but make sure they are with an adult, of course! You can buy headlamps in the sporting goods sections of big box stores.  They're pretty cheap...usually around $12-$20. This is one of the headlamps I have and it is perfect for my daughter!  We also use them while hiking, camping, and going on expeditions in our closets, like I wrote about in this post.

3.  They can run all year long, in all kinds of weather...as long as they are prepared.  You should always dress as if it is 10 degrees warmer out than it really is.  So, if it is 60 degrees out, have your child wear something that would be appropriate for a 70 degree day.  I also highly recommend technical clothing.  It doesn't have to be expensive...you can buy it at Wal-Mart for pretty cheap.  I usually get Little Miss's running/athletic clothes there when they are on clearance for around $3.00 each piece (tops or bottoms).  Of course, you can also purchase name-brand technical clothing for kids at sporting goods stores or online.


4.  It is a lifelong sport.  They will be able to continue running throughout their whole lives.  Many sports can be played for quite a long time through young adulthood.  And nowadays, you can find some adult leagues here and there of sports you play.  But with running, you can just step outside and go...no need for teams, membership fees, facility usage fees, etc.  And the best part of it is that it still can be social...if you want it to be!  You can join running clubs or go running with a friend. 
5.  They don't need a lot of expensive equipment to join this sport. Really, all they need is a pair of good running shoes.  I do highly recommend that you take your child to a running store and invest in a good pair of shoes that fits them properly.  But you don't have to!  That's the beauty of it!  You can have your child run in whatever shoes you bought them for gym class.  My daughter sometimes runs around in her Converse kick-around shoes.  Is it the best shoe for her to run around in?  Probably not.  But, if the alternative is arguing with her endlessly to put on her running shoes and/or not running at all, I will take the physical activity with the Converse shoes anytime! 

Other than that, the only necessary cost would be an entrance fee to a race, if that is the ultimate goal.  Entrance fees for 5k races can run anywhere from $5 for a very small, local race, to $30 or so for the larger, more well-known races in your area. 

Naturally, as with any activity or hobby, you can go out and purchase the best gear for your child.  Being the cheap-o that I am, though, I prefer to go to the clearance racks while my kids are still growing!
6.  It teaches them to get to know and listen to their bodies.  They will learn what their bodies feel like and how they react to different terrain and weather conditions.  They will learn to assess what feels right/wrong with their bodies, which can help them prevent injuries in running, as well as in other sports.  They can learn what foods and fluids best fuel their bodies for physical activities.  They will learn when they can push their bodies to perform at a higher level, and when they need to slow it down.
7.  You can join them in this sport...it's great for bonding or one-on-one time with your child, which, in turn promotes a greater overall well-being for your child.  If you are a goal-oriented, type A person, you may wish to get your run in before going out with your child, though.  Some children do not like to just go out and run.  They may prefer to run a bit, walk a bit, stop and do cartwheels, skip for a few steps, twirl around and then bend down to pick up rocks to throw (not that I have ANY experience with this, mind you 😜).  So if you need to accomplish a set pace or distance, it may be better for you to go out and get most or all of it done, then come back and get your child to go along with you.  It definitely relieves the stress of the stop-and-go-and-twirl method!
8.  It teaches them discipline.  If they want to accomplish their goals, they have to work hard at it.  They can't just show up on race day and expect to finish or finish well.  They have to get out there several times a week (I recommend 4-5 times).  It doesn't have to be every single day, but it should be pretty regularly in order to get them in shape and ready to run their 5k!
9.  It teaches life lessons:  They probably won't win.  Most races have hundreds of people running them (primarily adults), so unless your child is the Bionic Child, they don't have much chance of winning.  But, they do have to try their hardest...in training, and on race day.  They have to learn to be competitive with themselves, not just other people.  I think this is an important skill to learn.  One of the things kids are famous for is trying to be first.  First in line, first to the car, first with assignments in class, etc.  They want to beat everybody.  But that's just not the way life is.  Nobody is first all the time...like, in the history of EVER.  So, for them to have to focus on competing primarily with their selves, they learn this valuable lesson.  They learn that they can't always be first, won't always compete against friends and classmates (sometimes it's strangers), and need to strive to be better than the last time they ran.
10. It gives children a huge sense of accomplishment to train for and complete a race:  It's great for their self-esteem!  They will set a goal for themselves and see it through to completion.  They will run 3 miles!!! Most adults cannot even run 3 miles!!!  So for a child to achieve that is quite a feat!  And if you pick the right race, there will be spectators cheering them on, excitement everywhere.  Plus they will enjoy the comradery they will see on the course.  Runners are famous for it.  We adults all want to see each other succeed, but we have even a little more energy and enthusiasm when we see children out there doing it!  .   
You can start kids at a pretty young age with running.  Many local races have 100 meter dashes for little ones, and even 7 and 8 year olds can train for and run a 5k!  In this day and age, there are many, many race options to choose from...pick a fun one!  Then sign them (and you!) up, and get out there pounding the pavement!  Make sure you take it slowly...you should plan on about 2 months of training before the day of the race!  And know that there is no harm in walking during the race!  Whatever gets your child from start to finish is the ultimate goal...even if it means doing a few twirls, jumping, or pretending to fly like a bird! 

Yours in running,

Marathon Momma


Saturday, April 22, 2017

Spring Campsite Cleanup

Spring Campsite Cleanup #seasonalcamping #camping #glamping #camp #earthday2017 #childhoodunplugged #family #familytime #relax #outdoors #natureismyplayground #lovemykids #campdog

Wednesday, April 19, 2017

How to be a Fabulous Mom of a Tween in 5 Easy Steps


So you have a tween now, huh?  Tweens can be tough to deal with and to please, for sure! And figuring out your best parenting strategies for this age group can be quite challenging.  But don't worry!  I'm here to help you navigate this stage with grace...and love.  I've compiled a list of 5 easy steps to assist you.  Take note and be sure to share them with your friends and family so that they're on the same page as you!

Step 1:  Make sure to have your tween clean.  All.the.time.  Clean their bedrooms, clean their bodies, clean the bathroom, the living room, the kitchen, etc.  Because we all know just how much they love to clean.  And we definitely do NOT want to deprive them of this pure joy in life.  Give them every opportunity to help out around the house that you can.  They will LOVE you for it!


Step 2:  When they are not cleaning (but the house is SPOTLESS), allow them to have their friends over.  Then teach them how to dance...your style!  This is especially important for the tween and teen children in your household, as they love being taught new things by their parents.  And, let's face it, you've got the moves!  So why not let them share the experience with their friends!?!?!

Step 3:  If your home can easily pass the white-glove test, and their friends are not available for dance lessons, plop them right down in front of the TV (but make sure the remote's batteries are dead first).  Then perform a concert for their listening pleasure.  And do NOT let them do anything else.  I mean, you certainly don't want them to use any of their valuable cleaning energy, do you?!?!  Besides, actually watching TV turns them into lackluster zombies.  And, you can't have them zoning out while you're singing your favorite songs for their entertainment, amiright?!


Step 4:  Take them shopping!  But...be sure to wear your comfiest clothes (like maybe the ones that you typically wear around the house while cleaning--because they feel so great!).  Don't worry if they're stained or mismatched...after all, the shopping trip is all about them, not you!  And why should you have to suffer in uncomfortable clothes while they're picking out the trendiest of outfits?!


Step 5:  Try super hard to be the "cool" mom...especially in public!  You want your children and their friends, heck--the whole world! to know how awesome you are at dabbing and that you are always on fleek (whatever the heck that means, anyway).  Another super easy way to show your coolness factor is to display your enduring love for them...ALWAYS!  Hug them, give them kisses on top of their head, hold their hand...Especially while at the mall. This will ensure that they will fully understand and appreciate your fabulous mom power!

Well, there you have it!  The 5 easiest steps to being a fabulous mom to a tween!  I hope you found these tips useful!  Do you have any other great tips for parents of tweens?  Comment below!

Knowingly yours,
Marathon Momma


Tuesday, April 18, 2017

The Ultimate Guide to Family Travel as a Spoonie


Tips for Family Travel with Chronic Illness


Coming fresh off our trip to Lake Placid, NY with the kids, I thought it might be helpful for other people struggling with chronic illness to hear how I manage to travel with kids, my dog, and my plethora of autoimmune and chronic illness issues. 

Here are my top 10 tips for family travel with fibromyalgia and other chronic illnesses:

If you are driving to your destination, there are several tips I have for you.  I haven't flown anywhere since my illnesses emerge, so I can't speak to that just yet.  But some of my tips are definitely useful for any type of travel, since I am sharing with you many of my tips for your time at your vacation spot!

1.  Pack everything you will need for the trip AND the car the day before you travel.  It's too much on your body to do all of the packing and preparing for the trip...and then drive/ride in the car for several hours all on the same day. If you can adjust your schedule to do so, plan the whole day beforehand as your packing day so that you can pack a little, rest a little, pack a little, rest a little.


2.  Travel in the morning, if you are able to, so that you are only contending with your typical pain and fatigue, not your typical plus all-the-packing-getting-ready-managing-kids-pain-and-fatigue.  You will most likely still feel additional pain and fatigue from packing the day before, but you will be better off with having some sleep in between packing and traveling.

3.  Hopefully you will be traveling with another adult companion, be it your spouse/significant other, family member, or friend.  You need someone to go with you that will be able to do at least half, if not the bulk of the driving.  Traveling in the car tends to be uncomfortable for Spoonies, whether driving or resting in the passenger's seat.  But the additional mental and physical energy it requires to drive long distances can be even more fatiguing and you don't want to wear yourself out before you even arrive at your destination!

4. Try to make frequent rest stops to use the bathroom, grab a bite to eat, and stretch your body out.  But keep them as short as possible.  You need to have the break from sitting, but the longer it takes you to reach your destination, the more fatigued you will be.  Of course, with kids in tow, frequent stopping is completely typical anyway, so take advantage of the kids' needs to meet your own, as well.  If you're like me and have IBS, too, that can mean more frequent stops, as well.  It can also mean that you may run into a situation where you need a rest area immediately, but there isn't one in sight.  Many times in the past, we have scooted off the highway to the nearest gas station, store, or fast food joint.  Just like for the kids, make sure you always have a package of wipes, plastic bags, and an extra outfit packed in your car that is easily accessible...just in case.


5. Try to schedule your trip so that you are not in a rush to get to your destination.  Even though the goal is to arrive in as little time as possible (limiting your sitting time), if you add the pressure and stress of a scheduled arrival time, it will increase your fatigue and pain.  So if you can, just go with the flow and try to enjoy the downtime with the family! 

6.  But also make sure you have activities for the children to do!  That's typically a mom no-brainer.  But when you have a chronic illness, the noise from the children being in such close proximity to your ears could make you extremely irritable.  You MUST prepare for them to be occupied if this is a possible outcome for you on your trip.  The point of traveling with your family is to have fun together and spend quality time together, not for the kids to be driving you nuts so much that you end up on the brink of insanity, screaming at them to JUSTBEQUIET because it truly hurts your ears due to their highly sensitive nature.   Oh, and also--the Quiet Game almost always works!  Whenever I say those magical words, "One, two, three, four, Quiet Game!"  I am guaranteed at least a couple of minutes of no whining, complaining, shouting, squealing...you get it! So use it whenever you need to!


7. Once you arrive at your destination and settle into your room, take at least a 20-30 minute rest.  If there is still time left in the day to do any sight-seeing or fun activities, you will need to recuperate as much as you can from the drive.  Of course, since we are often fatigued no matter how much rest we do get, you will most likely still feel it when you are up and moving about again, but that little bit of a rest could mean the difference between enjoying your family and wanting to cringe every time they speak.  (It ain't easy being a spooned!)

8.  Throughout your trip, plan times that you will be back in the hotel for downtime if you can.  The kids need the rest as much as you do (even if they don't want to admit it!).  I can't always get a nap in when we travel, but I have to have rest time planned into each day.  Sometimes that might mean just sitting down on a bench at a park or attraction for 15-20 minutes several times throughout the day if it's not feasible to go back to our room.  But life has changed since being diagnosed with my illnesses, and in order for me to last throughout the day, our pace for sight-seeing is no longer break-neck.  It might mean that we cannot do everything we'd like to do at our destination, but that's okay.  The point is to enjoy your family, experience new things together, and see the world. That doesn't mean that you have to kill yourself doing it!  You will be of no use to your family when you return home if you completely overdo it while you're away.

9.  The kids are probably going to want to take in all of the sights and activities that are energy-consuming for you.  But that doesn't mean you cannot choose an activity or two that is less physically-exhausting.  I find that when I plan activities for the children that are lower-key, mixed in with the exciting, all-consuming, physically-draining ones, it makes it less exhausting for them, too.  And they appreciate those moments just as much, when we are sitting in a park watching the squirrels, or next to the ocean/a lake/a stream breathing in the smells and relaxing to the sounds of the water.  Just as kids need to learn how to be "unplugged" from electronics, they also need to learn to just "be"...in nature, in the moment, with us, in our world...without the "whatarewedoingnext" mentality we've come to know and expect in our culture today.

10.  If you are able to, I highly recommend scheduling at least one down day right after you return from your trip.  Don't make any major plans to do ANYTHING!  And if you can, try to enlist the support of family or friends to help with the kids that first day you return home.  You will most likely need to rest quite a bit and the vacation laundry may have to wait a day or two, but it will all get done eventually.

If I think of more tips, I will come back to this post and edit it to include them, but for now, that's all, folks!  Do any of you have tips you could add to the list?  Please share them in the comments below!

Exhaustedly yours,
Marathon Momma


Sunday, April 16, 2017

Family Hike in Lake Placid

Family Hike in Lake Placid

Enjoying our little #getaway to #lakeplacid with our #kids and #goldenretriever Kallie. So thankful to the @crowneplaza_lakeplacid for the room upgrade and the many surprises for the kids! What a beautiful and welcoming resort! #easter #travelwithkids #goldenretriever #travel #travelwithdogs #lakeplacid #iloveny #lovemykids #adirondacks #livelife #childhoodunplugged #weekendgetaway #familytime❤️ #goldensofinstagram #blogpost #memoriesofmarathons


via Instagram http://ift.tt/2okyhKN

Easter in Lake Placid, NY

Easter in Lake Placid, NY

Easter2


#Marathonmomma #familytime #lovemykids #lakeplacid #iloveny #travelwithkids #travelwithdogs #goldenretriever #mommyandmetravel #travel #adirondacks

Happy Easter!

Happy Easter! #Marathonmomma #familytime #lovemykids #lakeplacid #iloveny #travelwithkids #travelwithdogs #goldenretriever #mommyandmetravel #travel #adirondacks

Thursday, April 13, 2017

How Do I Organize All of My Bullet Journal Supplies?


How I Started Out Organizing My Bullet Journal Supplies

If you're anything like me, then once you start working on a bullet journal, you start accumulating fun supplies to personalize your planning and journaling. Well, as you amass a collection of stamps, inks, writing utensils, stickers, etc., there becomes the issue of organizing and storing your supplies.  Ideally, whatever system you choose to use should allow for at least some of these things to be portable so that you can bring them with you to journal and plan on-the-go. 

I am going to share my organizing ideas with you so that you can get more ideas of what system it is that you wish to use to organize your own bullet journal and creative planning supplies. I will show you what worked for me, and what didn't...well, I'm actually going to begin with what didn't work the best for me and then show you how I improved my system.

When I first started organizing my supplies, I didn't want to have to spend any money.  I would rather have spent the money on the fun supplies!  They add up quickly!  So, this is what I had around the house to start with:
  
Creative Planner Supplies

The large, clear carrying case was something I got from Michaels.  The two containers with green lids were originally from the dollar store, and the small pink and purple cases were from Staples.  Those small cases were perfect for me to store my tiny rubber calendar/appointment stamps in. Some of those stamps are as small as your pinkie nail!  You don't want to lose them!  The containers with the green lids had two purposes.  One of them was used to hold all of my mini stamp pads, as well as my small acrylic stamp blocks like this:


The other container became a catchall for my pencil sharpener, eraser, tape runner, and fun doodads like small, colored clothespins, my post-it flags, scissors, etc. 

I borrowed my daughter's pink and black leopard zipper pouch to hold my pencils, markers, and pens.  I sort of felt like I was in elementary school all over again!  As I started to accumulate more writing utensils, that case wasn't big enough anymore.  And, although quite large, the clear Recollections case very quickly became too small to use.  

What I had liked about the clear case originally was that it held everything I had at that time, including my creative planner and the hole puncher I had purchased to go with it. I also liked having a handle on the case to carry it with me.  The case became quite cumbersome, though.  I mean, the thing is ginormous!  If you aren't planning to take it with you anywhere, it is a great case to store your supplies in, but I really needed mine to be portable.  And as my supplies grew they no longer fit in the case...at least not in this way. 

I realized I needed something else to use, and saw these pouches on clearance for 75 cents a piece, so I gave them a try.  They weren't the cutest pouches in the world, but I figured I would just add a vinyl decal on them with my Cricut, and that would increase their curb appeal for me.  

Carrying Case for Bullet Journal

So, one of the pouches I used for my writing utensils, and the other one I tried to fit all of my office supplies, doodads, and stamp pads in.  Well, they became too bulky and I just felt like they were disorganized! This Type-A lady couldn't handle that!  So I was on the search for a new system!

After quite a bit of contemplating and searching, I came across this bag:


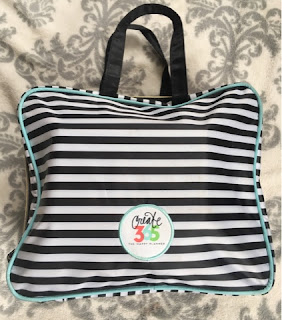
When I saw it at Michaels, it was $29.99 and there was absolutely NO WAY this frugal momma could justify spending that kind of money on a case for my journal.  But, as we all know, Michaels has coupons!!  I had a 50% off one, and I decided that this case would make my bullet journaling much easier, so it was worth the $15!  And let me just tell you that I LOVE it!!  The thing is a workhorse.  Let me show you how I use it.


How I Set Up My Bullet Journal Carrying Case
   
This is my actual bag, loaded with all of my crap!

Creative Planner Carrying Case

I didn't take a picture of it, but there are actually two large zippered compartments that are separated by fabric in the middle. The fabric on the outside is a smooth fabric that feels like one of those kinds you can wipe clean.  I haven't spilled anything on it yet, so I can't say for sure if that is true, but it definitely feels like that kind of fabric!

I love that everything is completely enclosed in the case, and that it seems pretty darn sturdy.  I have that thing packed and can just barely zipper it closed, but it doesn't feel like it's coming apart anytime soon (if at all)!  The same thing goes for the handles.  They're pretty strong, as well!

Inside
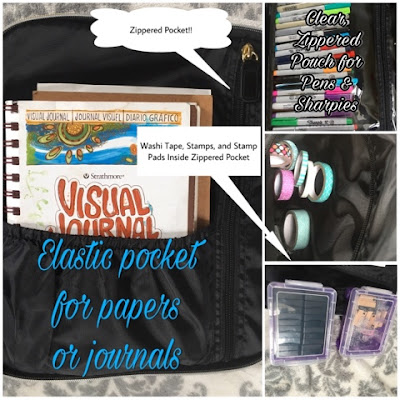
When I first open up my case, the large compartment is big enough to hold my creative planner. On the left side of the case, you can see that there is a large pocket.  It doesn't have any way to close it, which is sort of a downfall, I feel.  But I'm thinking I might add some Velcro to it so that whatever I store in it won't fall out.  Currently, I am using it for papers.

When I take my journal out, there are two detachable, zippered, see-through pockets.  This is what finally sold me on the case, actually.  I liked that I could remove them and place them in front of me to easily remove supplies as I am working.  I like that they're see-through so that I can easily access the particular item I want.  And I like that they are zippered so that my supplies stay put! You can see in the photo that I use one of the pouches for my sketching pencils, and one for my office supplies.


Organizing My Bullet Journal Supplies


On the other side of the carrying case, there is the second zippered section.  When I open that up, I have an elastic pocket on the left, which is large enough to hold my sketchbook! Behind that pocket is another large zippered pocket, where I store my washi tape along with my little cases for the mini rubber stamps and stamp pads. I actually ended up buying two new ones that were a little bit longer and flatter, though.  I found them at Wal-Mart, in the office supplies section and they were pretty cheap ($1.25 I think??).  They're a much better size for my mini stamp pads and stamps, for sure!

The right side of this section is a giant, see-through, zippered pouch.  This one is not removable, but I still love it!  It is big enough to store all of my pens and sharpies!! 

Creative Journal Carrying Case Interior


As you can see, this carrying case holds a TON of supplies!!  Everything I really need to journal and plan on a regular basis is in this thing.  The only thing I couldn't fit in it was my hole puncher.  Oh, and the kitchen sink.  The kitchen sink will not fit!

Does anyone else have this case?  Do you love it like me? Or do you have a different opinion? What other organizing systems do you use for your bullet journal supplies?  Write a comment below and let me know!

Until next time...

Organizationally yours,

Marathon Momma


Tuesday, April 11, 2017

Let's Do Some Good!


Follow my blog with Bloglovin
just love equality design

Marathon Momma Online Shop

I am in the middle of working on my next post about bullet journaling as I promised in my last post...(my supplies and how they're organized)!  But I sorta got sidetracked (like I often do!!) and I set up an online shop on Zazzle, which you can see right here:


View more gifts at Zazzle.


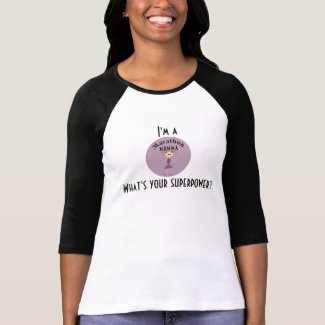
I'm super excited to share my logo with you all!  Are you a Marathon Momma, too?  Running Mommas...wear one of the Marathon Momma tech t-shirts in your next race to proudly show the other runners just how freaking AMAZING you are! And Mommas who might not run races, but run-after-kids all day, wear your Marathon Momma t-shirt as a badge of honor that shows that you are not only surviving each day, but KILLING it! 
You can even be a Marathon Momma, fighting the good fight of putting one step in front of the other, first thing in the morning with an adorable insulated travel mug!  It's perfect for your coffee, tea, or for when you have to attend yet another kid's birthday party and need to disguise the vodka.  (Just kidddddding!  I would never recommend that!)...Or would I???  Sometimes ya just need a little something extra!  Hahaha!

Marathon Momma Donates

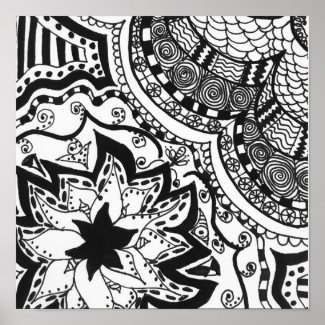
I also am creating other products from my own artwork and designs in my online shop.  Like those fun Zentangles I posted about a while back...you can have a poster or canvas print of them! 


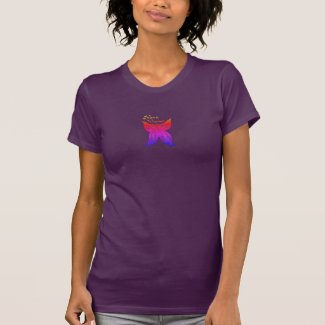
And the Zentangle butterfly for fibro warriors...well, not only can you purchase a shirt with the butterfly I designed on it and wear it to show how strong you are as a fibro sufferer, but your purchase will also be making a difference in the lives of other fibro warriors, too! 


A portion of all proceeds will be donated to the National Fibromyalgia and Chronic Pain Association!!  So, how it works is that I will make a portion of each sale in my shop on Zazzle, which helps me continue to blog, and will hopefully allow me to once again contribute financially toward my family. So, yes, I do benefit from a sale...BUT...I will also be sharing the love, too!  Just like this fibro butterfly, several of my designs will benefit different charities.

For example, I also created a special design called "Just Love".  I am a strong supporter of equal rights...for EVERYONE!  So I created this design to add to t-shirts, bags, stickers, etc. that will help benefit the American Civil Liberties Union

A portion of every sale from this design will be donated to the ACLU!  The ACLU is fundamental to our democracy.  Their mission, as stated on their website, is "to defend and preserve the individual rights and liberties guaranteed to every person in this country by the Constitution and laws of the United States." 

Those are just two of the organizations I hope to make donations to, and there are many more!  For each design I create, I will mention in the description of the item on my shop what charity will benefit from it. I am wicked excited about this additional path to my blog and I hope you will help me add support to these wonderful organizations! Please share my post or Zazzle Shop with your friends and family, and together, let's do some good!

Just love,
Marathon Momma

Wednesday, April 5, 2017

Bullet Journaling (Part 2)

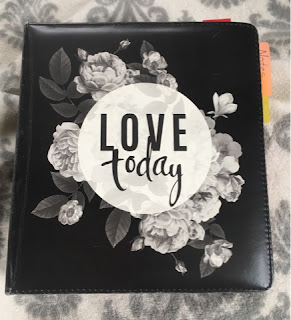
Picture of My Planner

Happy Wednesday, everyone! So last week, I wrote a post about what a bullet journal (bujo) is. If you missed out on that post, you can find it here. This week, I am going to share with you how I am using my bullet journal/creative planner to keep my life more organized.

My Introduction to Bullet Journaling
Before I do that though, I want to walk you through my process of choosing how to get started and dive right in. As I said in my last post, I really didn't know much about bullet journals until I happened upon them while searching up creative lettering in Pinterest. As I came across pin, after pin, after pin of fabulous ideas, I really wanted to give it a tiny little try.

Well, I just so happened to come across one of my kids' drawing pads on the kitchen table and I was feeling very fatigued (and quite frankly, also trying to avoid working on the mountains of laundry I had to do). So I slid the drawing pad over and began to sketch. I started out very simply...writing words in fancy fonts with borders around the page and a few doodle elements. I had to keep my Pinterest app open on my phone so that I could search up ideas. Here are my first few doodles:

creative lettering familycreative lettering friends

sketch of word love

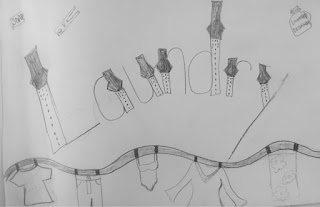
And here is the sketch that unmasks the truth:

sketch of word laundry


Instead of doing the laundry, I just drew it! Hahaha!

After a few simpler sketches, I decided to try something a tad more challenging and intricate, so this is what I drew:

sketch in bullet journal

Sketch in Bullet Journal

As you can see, my sketches and ideas became more complex...and that is mostly because I kept coming across more bullet journal tips and ideas.  At this point, I knew I wanted to try out bullet journaling.  I loved the whole idea of it! 

Finding the Right Bullet Journal or Planner
In what little spare time I had, I started searching for the right type of journal that would work best for me. I read other bloggers' reviews and recommendations.  Here are some of the most highly recommended journals:


After reading what experienced bullet journalists liked using, I checked out reviews on Amazon and craft store sites, and finally, I headed to the stores to look at what they had to offer.  At each store, I found different types of journals and planners.  I had to really think it through and consider it an investment (they ain't cheap!).  I began to develop a list of criteria in my head for what I wanted to be able to do in my journal/planner and this is what I had decided it needed to have:

  • Visually attractive...if I'm going to be using it all day, every day, I certainly want to enjoy the experience! :)
  • Blank pages for creating collections (like lists...bucket lists, book lists, movie lists, etc.), journaling, and sketching.
  • A pen/pencil holder.
  • A monthly calendar already made and printed out for an at-a-glance look at the month's appointments and events. I am a fan of making life easier for myself and although I simply adore what other people are able to create graphically, I would prefer to not have to recreate the wheel (or calendar) each month.  I think many other busy moms are in the same situation... trying to take extra time out frequently to draw calendars is just something I am not willing to invest the time in. Besides, I think this is one of the things that felt overwhelming to me about creating a bullet journal...it's labor intensive, so I took it off my to-do list and found a pre-printed calendar where all I had to do was fill the dates in.
  • A weekly calendar...again, pre-printed.
  • A notepad to take notes on whenever I need to...especially for handling all of the tasks involved in caring for Miracle Man...phone calls to doctors, questions to ask any of the professionals involved in his growth, education, and care.
  • Pockets for storing receipts, papers, supplies for my journaling
  • Rings and a hole puncher...this was particularly important to me because I wanted to be able to create my own bullet journal printables and be able to put them into the journal easily. I also wanted to be able to hole punch any piece of paper that I wanted to keep track of and put that in my binder.  It was important to me to be able to move papers around, as well.
  • Large enough to keep tons of notes!!!  I wanted to be able to put all of my to-do lists, shopping lists, schedules, calendars, all in one place.
  • Meal planner--I have only used this a couple of times so far, but I do intend to use it more frequently as I get into more of a habit of tracking everything!
  • Inserts for putting pictures in.
  • Dividers so I didn't have to make my own for all categories
It took a few weeks to finally track down the perfect journal/planner.  And, really, it wasn't perfect as-is. But I am super happy with my choice. I did have to purchase additional supplies in order to customize the planner to my specifications, but I finally feel like it has everything I need. 

Here is the planner I purchased and the hole puncher that goes with it:


So, in the end, I had decided to go with more of a planner type of style, but I still wanted to incorporate the bullet journal ideas like the collections and lists, as well as the creative aspects.


How I Set Up My Journal
I consider my journal to be a hybrid journal because it's not set up exactly like a bullet journal, but it's definitely more than a planner. Many of the features that came with the planner are typical of the ones found in the creative planners you can purchase on the market.  I will show you some of the cool ones below, as well as some of the features I added to my planner to make it better suit my needs. So without further ado, here is how I set it up.

Keep in mind, that I only recently started this process, so I'm really a newbie and have a ways to go before I am utilizing more of the possibilities.

      Inside of Journal

Inside Front Cover
Inside of Front Cover...Has Pockets For Papers


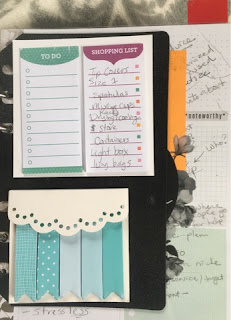
The first thing I see when I open up my planner is this plastic divider. I had it laying around the house from my old DayRunner that I used to use in graduate school. The pre-punched holes didn't quite fit in my new planner, so I had to hole-punch it to get it to work. Then I glued on these sticky notes so that they would be right in my journal, ready to use at a moments notice. I like that they are the first thing I see when I open up my binder because I can highlight my most important to-do tasks and shopping lists and see them immediately each time I open up my bullet journal. I found the sticky notes at Michael's, and I love them! The little flags in varying shades of turquoise I use to highlight specific pages that I need to keep track of in my journal. They are a little bit flimsy for the purpose I am using them for, so I will have to find something else to use in their place. But aren't they just adorable?!


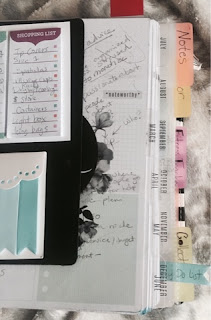
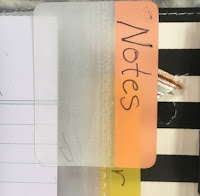
The planner came with the month dividers and spreads, as well as the weekly spreads.  Each of the monthly dividers is made of a clear plastic and decorated with a floral design. As you can see, I added some of my own tabs.  I found these at Wal-Mart, in the office supplies section.  I like that they are colorful and can stick right to the page that I want them to. Here is what they look like up close:


In hindsight, I wish I had taken more time to write on these tabs and make them look prettier.  I think I was just feeling so incredibly overwhelmed at the time about setting up the whole planner that I kind of rushed through it.  Regardless of how lackluster they look, they work and so for now, I will just leave them be.


This customizable page is the first page of each new month.  It came with the planner. I like having a space to plan my goals for the month and writing down a favorite quote.  It helps keep me focused and mindful/intentional throughout the month. 

Here is the monthly spread that comes with the planner.  I love not having to create a monthly spread each month because just filling in the dates, appointments, events, etc., and highlighting important moments with my stamps is time-consuming enough for this busy Momma! Speaking of the stamps, I do plan on creating a Key so that I can be consistent with the meanings of each stamp and color, but I haven't had the time to do that yet. 

I love the blank spaces around the month where I can write some notes about what needs to be done or remembered during the month. Since we are only at the beginning of this month, there isn't that much scheduled yet.  But there will be! By the end of the month, there won't hardly be any space left on these pages!!


Next come the weekly spreads.  Again, I have to add in the dates (which I don't really mind, because I actually like that these weekly spreads are so flexible because they are not dated).  I try to add my appointments in the monthly and weekly spreads immediately.  Sometimes, though, I do have to remember to sit down and sync all of the calendars just to make sure I don't forget anything.  This is where I typically write my most important to-do's for each day.  I love how much space I have to write everything down!


At the end of each month, there is a note page.  It's really not enough room for me to take all of the notes that I need to on a regular basis, so I ended up adding a whole Notes section.  Above, you saw that one of the tabs that I added was this Notes section.  I couldn't find a notepad that was pre-punched for this brand and size planner.  But, in the clearance section of Michaels, I did find a notepad that coordinates with my planner.  I had to rip off each of the pages individually and hole punch them to put them in the binder.  I'm not entirely pleased with the notepad in the end, though, because it isn't just a straight notepad.  Each page is different and some of the pages have round, oval, square, or rectangle shaped spaces that are pre-labeled. They're mostly made for journaling.  I may use some of the pages to journal, but at the moment, I am really focused on note-taking, so they don't really work for me.  However, it does give me a space to write! I will be on the lookout for a replacement that suits my needs better. I'm also creating printable bujo pages that I can fit in my planner and if I don't find a notepad that works, I will just print out the one that I made on my computer (after I buy more ink for my printer, that is!!!).


Do either of these Zentangle drawings look familiar?!  I posted the pic on the left in this post. And the one on the right I posted on Twitter a while back.  Side note:  The butterfly is the adopted symbol of fibromyalgia sufferers (like me). Anyway, I slid them into some sheet protectors I purchased for the planner to use as dividers for different sections.  It's kind of nice to see my artwork daily, instead of having it in the drawing notebook, tucked away somewhere. The package of sheet protectors came with different sheet set-ups so that you can use them to put in photos of different sizes, notecards, business cards, etc.  There were several of each type included.  These sheet protectors weren't made by the same company as my bujo, so they didn't have the proper holes punched in them.  But, they were the right size to fit in my planner, so I just hole punched them! 


The next part of my planner is filled with my own sections.  I have my general notes section, a section for Miracle Man (to keep track of anything I need to for his care), and my Collections section.  I created an Index (similar to the typical bujo Index) for the Collections to help me keep track of them.  Then I added the collections that I made prior to having a bujo.  Gotta love that hole-puncher!!!  I also tore off the remaining blank pages of my sketch book and hole-punched them to add here for more collections.  I LOVE this section!!!!  This is where I do more of my journaling and creating. Below you can see some of the ones I have done so far.


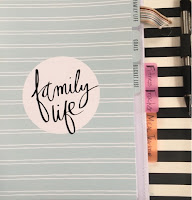
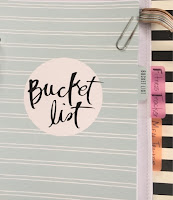
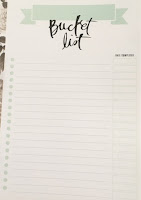
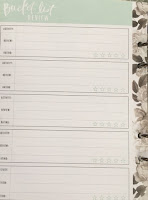
After my personalized tabs, there are a few more tabs that came with the planner. There is a Family Life tab, where I can keep track of my family's activities, a Goals tab, where I can set goals and write up my plans for how to achieve those goals, and a Bucket List tab.  I love that these tabs are already created and set up with the lines and features that are very user-friendly. Here are some pics I took to give you an idea of what these tabs are like:


The last two sections I have in my planner so far are my fitness tracker (which I have to sheepishly admit that I haven't used just yet), and my meal tracker...with shopping list.  These are two tabs I really wanted in my planner, but which didn't come in the planner I purchased.  I could have created my own spreads by hand, but I think you can guess by now how I would feel about that!  I would rather put my creative time into super-fun collections! 

So anyway, I found these two trackers at Joann Fabric's, and like several of the other features I added, they weren't made by the same company as my planner. And as such, they did not have the correct holes. So, yup!  I hole-punched them!  I want to point out here, too, that many of these things that I added to my planner I had to purchase on the same day as when I got my planner so that I could match up the paper sizes. Of course, you could always just bring a set of measurements with you to the store if you didn't do it all in one day...but that would mean another trip to the store.   
     
Notice the blank pages?!?! I've gotta get my butt in gear!!

I have used this a few times, but not regularly yet.  Take a look below at my favorite feature of this section!!


Ohhhhh, yeah!!  That's right!  That is a scored and perforated tear-off-able shopping list!!  Yippeeee!!!  I heart it!! And did you happen to notice the pencil holder loop on the planner?!  Essential, in my opinion!!
Okay, so that's a wrap.  My planner/bujo is complete!  Well...almost!  I have some other ideas that I would like to add to it over time.  For the most part, though, I'm pretty pleased with it.  How'd I do as a newbie? Do any experienced bullet journalists/creative planners have any additional tips for me?

Yours in bujo obsession,
Marathon Momma

P.S.  My next post will be all about how I keep my fun supplies organized!!  It took me a few weeks to come up with the best system, but I've got it now!!